


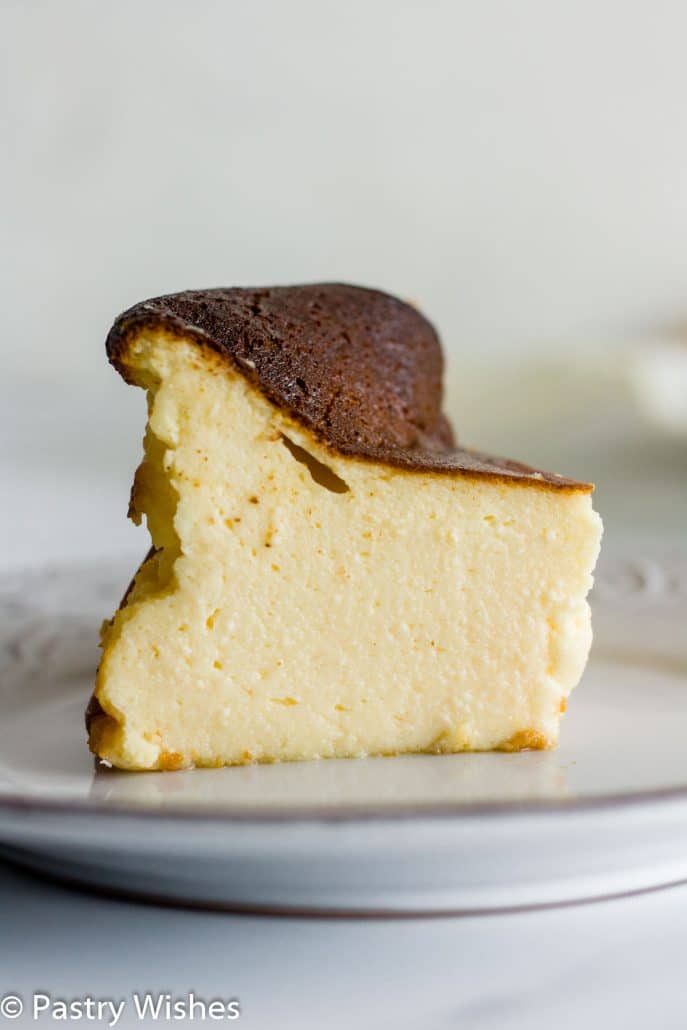
This light, luscious, and creamy mini burnt cheesecake is mouthwatering! A simple, delicious, 6 inch cheesecake recipe that’s perfect for two people (or one)!

Crustless, creamy, and slightly sweet with a subtle vanilla flavor!
This cheesecake is also definitely one of the easiest recipes I have on the blog and totally irresistible!
This mini version is the perfect dessert for when you only want to make a small batch. I think you will love this mini burnt cheesecake!
Want to try some other cheesecake recipes? Try my Classic New York Cheesecake or this amazing No-bake Biscoff Cheesecake!
Jump to:
- ABOUT THIS SMALL BURNT CHEESECAKE RECIPE
- Why this recipe works
- The origins of this cheesecake
- What does this mini burnt Basque cheesecake taste like?
- WHAT YOU NEED TO MAKE THIS MINI CHEESECAKE RECIPE
- HOW TO MAKE THIS RECIPE
- Recipe Notes
- TOPPINGS
- TIPS FOR SUCCESS
- FREQUENTLY ASKED QUESTIONS
- MORE DELICIOUS CHEESECAKE RECIPES!
- Recipe
ABOUT THIS SMALL BURNT CHEESECAKE RECIPE
When making regular cheesecake, like traditional American cheesecake, there are so many different factors involved in getting it just right! For example, we don’t want any cracks on the top and we don’t want to burn it, either.
This cheesecake, however, is the exact opposite! It doesn’t matter if there are cracks or if it doesn’t look uniform! And, we actually want to burn it!
That’s what is so amazing with this burnt cheesecake recipe! It’s perfect for new bakers!
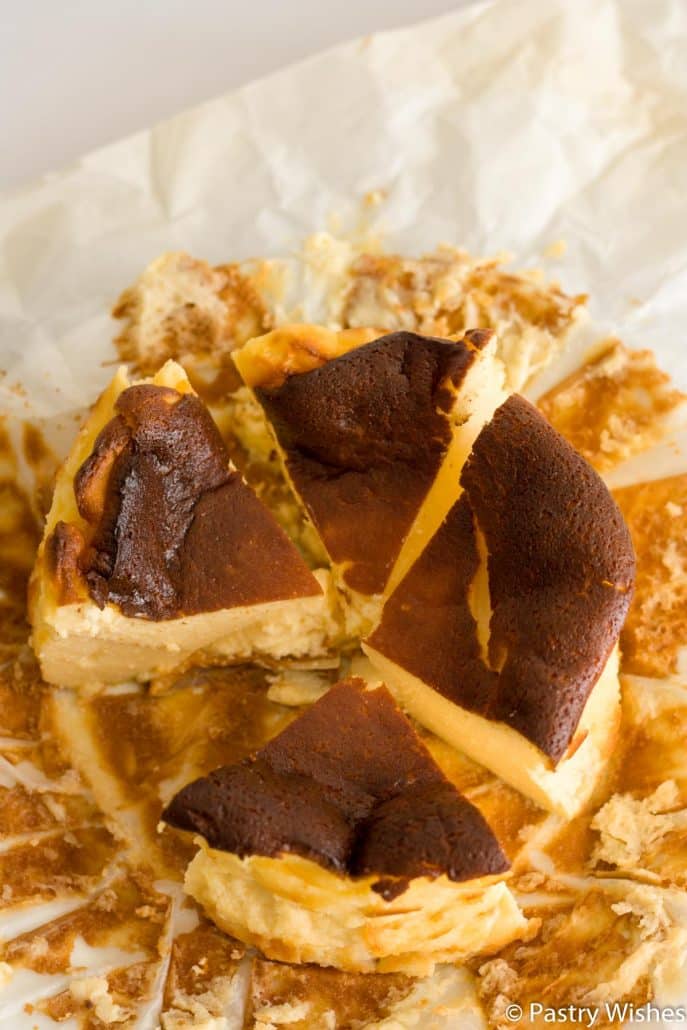
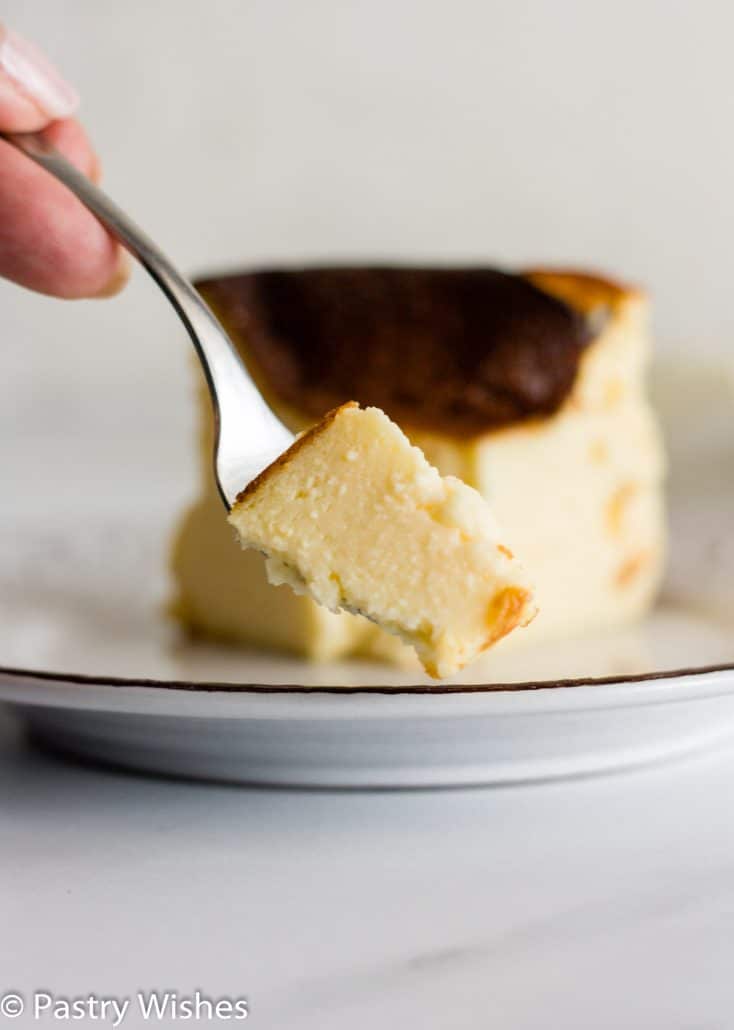
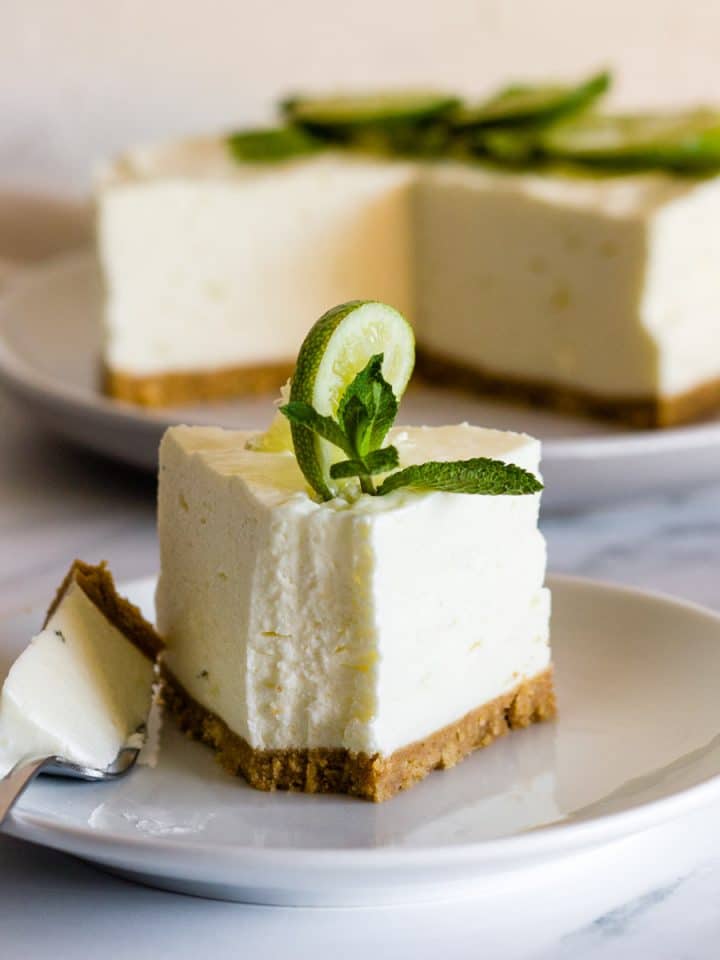
I also love the rustic look, particularly the vivid contrast between the dark brown outside and the creamy white inside, together with all the little cracks and rugged edges!
Why this recipe works
- It’s practically foolproof! Like I said, you literally can’t go wrong with this recipe because it’s so incredibly easy!
- A great summer dessert! This mini burnt cheesecake is fantastic in the summer because it’s so good cold!
- A few simple ingredients! You only need 7 ingredients for this recipe, most of which you probably already have in your pantry!
- It makes a perfect small batch dessert! Great for small gatherings or get-togethers. Also, if you have a craving, but don’t want to make a big cheesecake, this recipe is great for that!
The origins of this cheesecake
This burnt cheesecake was developed by Santiago Rivera of La Vina restaurant back in 1990 in San Sebastian, the Basque region of Spain. Since then, this dessert has literally taken over the whole world!
What does this mini burnt Basque cheesecake taste like?
This mini Basque burnt cheesecake recipe is very light, creamy, and airy. The burnt top is incredible! It doesn’t taste "burnt" at all and it's very caramelly, much like the top of crème brûlée!
WHAT YOU NEED TO MAKE THIS MINI CHEESECAKE RECIPE
Ingredients for mini burnt cheesecake
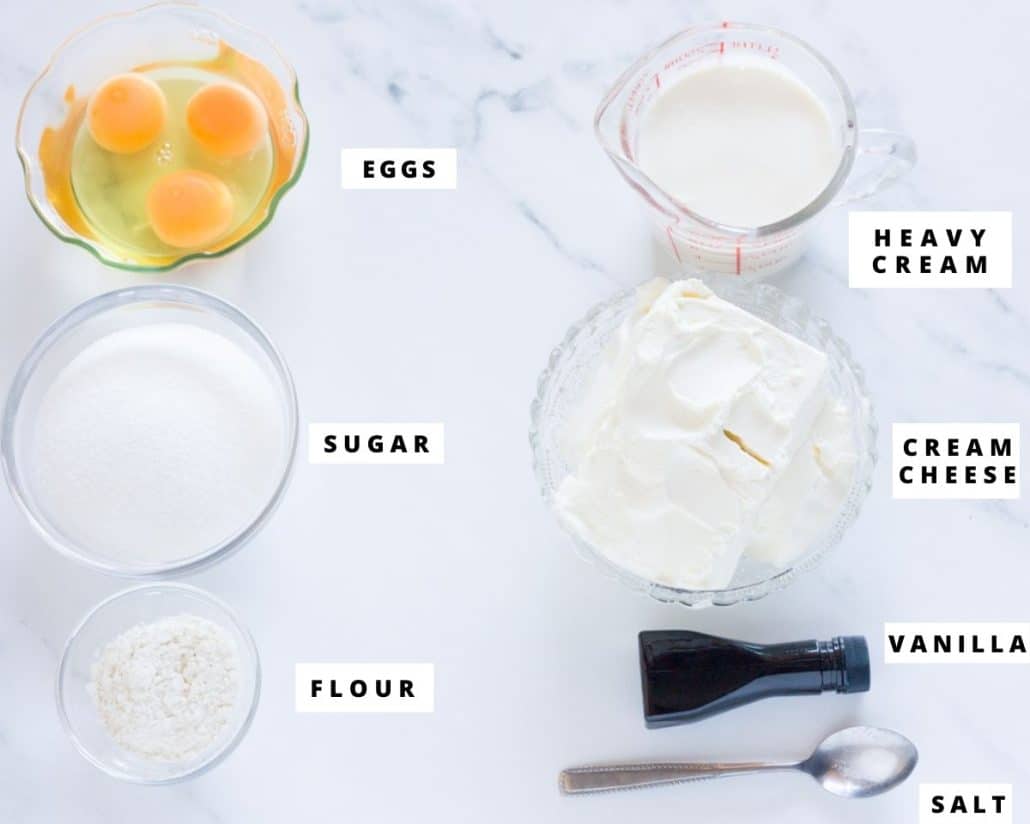
- Eggs: I use 3 whole eggs (small or medium-sized).
- Heavy cream: I use heavy whipping cream because you need the fat to thicken the dessert.
- Cream cheese: You need room temperature cream cheese. I use regular, full fat cream cheese so the creaminess of the cheese really shines through!
- Sugar: I use white, granulated sugar.
- Vanilla: I use pure vanilla extract, but it also tastes incredible with vanilla bean paste.
- Flour: I use a small amount of all purpose flour.
- Salt: I use a pinch of salt to enhance everything.
HOW TO MAKE THIS RECIPE
Step-by-step instructions
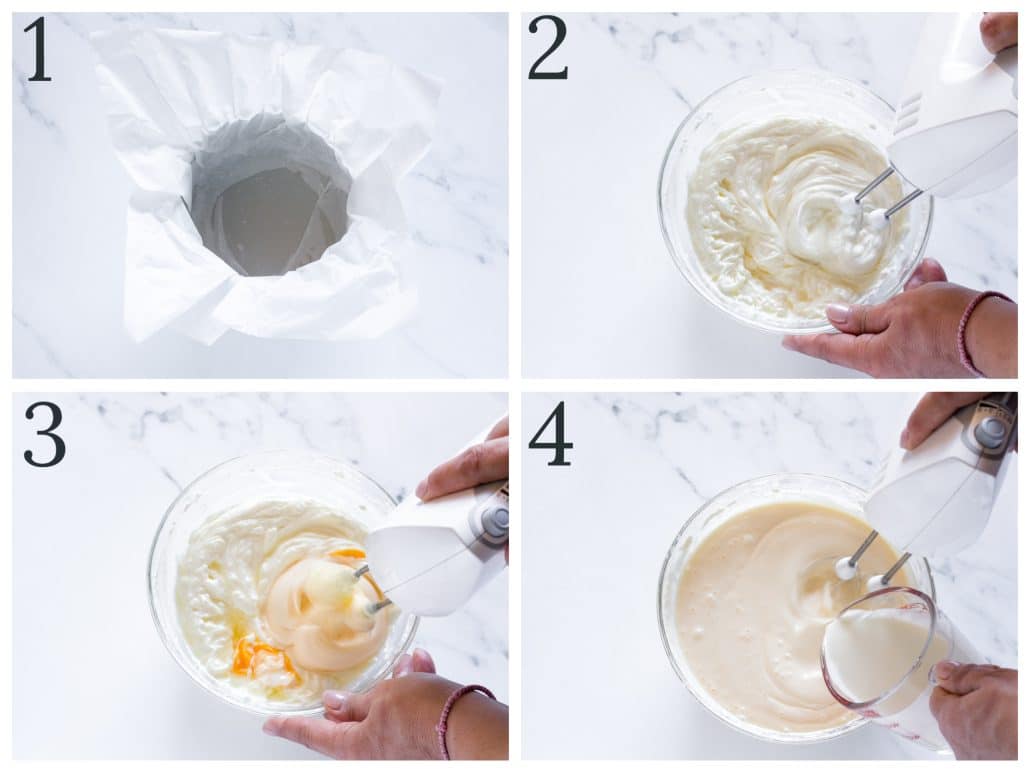

STEP 1
First, line the pan with a sheet of parchment paper. I like to grease the pan first so that the parchment paper sticks to it. Make sure to press the sides to create pleats that extend the pan.
STEP 2
Using an electric mixer on low speed, beat the cream cheese, sugar and salt until everything is creamy, about 2 minutes. Make sure to scrape the sides of the bowl as needed. If you want, you could use a stand mixer, but I find it much easier to use a hand mixer, instead.
STEP 3
Add the eggs, one at a time, beating for one minute after each.
STEP 4
Add the cream and the vanilla and mix until just combined.
STEP 5
Stop the mixer and add the flour by sifting it over the mixture.
STEP 6
Then beat on low speed again for about half a minute to combine everything.
STEPS 7-8
Pour the cheesecake batter into the prepared pan and bake it in the oven!

Recipe Notes
Storage Tips
Store this small Basque cheesecake in the fridge for up to about 4 days. Make sure it’s covered tightly with plastic wrap.
Freezing Instructions
You can easily freeze this mini Basque cheesecake! What I like to do is wrap individual slices in plastic wrap and then place them in a freezer bag or freezer safe container. Store it in the freezer for up to about 2 months!
TOPPINGS
Personally, I love this cheesecake plain and cold. It tastes so good the day after it’s made! However, feel free to add your favorite toppings when you serve it! Here are a few ideas:
- Strawberry jam.
- Homemade chocolate syrup or whipped cream!
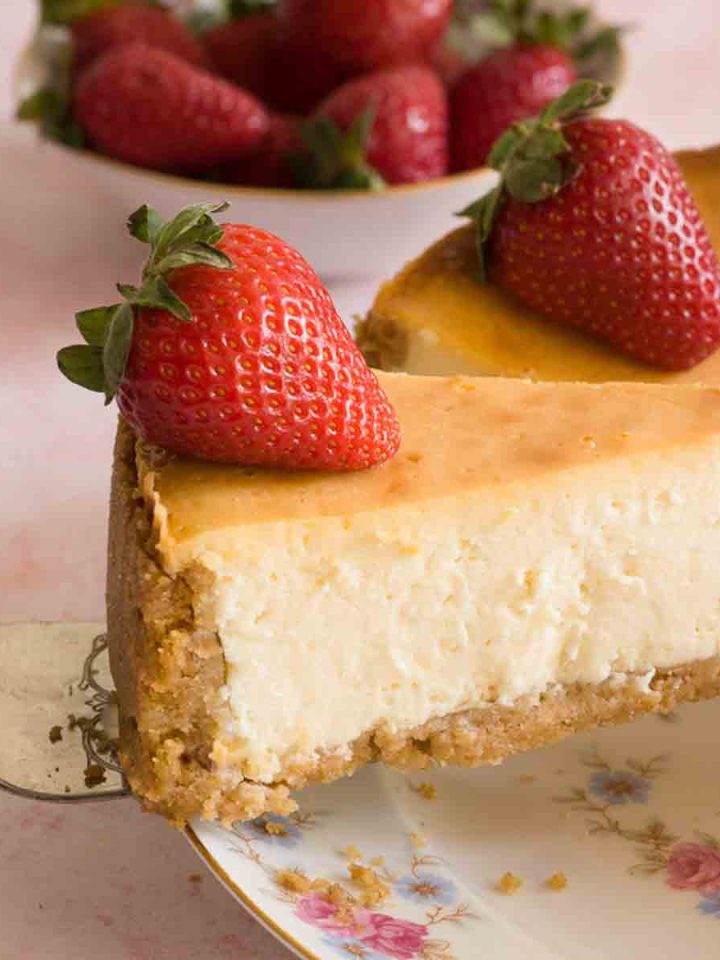
- Fresh fruit like strawberries really go well with this mini burnt cheesecake!
- You could also add a little bit of lemon zest for a more citrus flavor.
TIPS FOR SUCCESS
- For best results, weigh all the ingredients with a digital scale before beginning.
- Make sure all the ingredients are at room temperature when you start.
- You could use a 6 inch springform pan that has a removable bottom if you want, but I found that using a 6 inch cake pan was a lot more convenient - you just lift the parchment paper out of the pan.
- Combining the ingredients on low speed results in a silky smooth texture without overmixing the batter.
- If you like it even more burnt, you could bake it for 5-7 minutes more than the stated time.
- For a soft, slightly gooey center, you can bake it about 10 minutes less than the suggested time.
FREQUENTLY ASKED QUESTIONS
This mini cheesecake will last for about 4 days in the refrigerator, but it rarely lasts that long in my house! Just make sure it’s covered with aluminum foil or plastic wrap.
If you’ve ever tried New York cheesecake, you’ll notice that it’s quite different from burnt basque cheesecake.
First of all, New York-style cheesecake is pretty dense. Burnt cheesecake, though, is incredibly smooth and creamy.
Also, classic New York cheesecake has a crust, whereas the basque cheesecake doesn’t.
Another difference is that the burnt cheesecake is baked at a high temperature to create the characteristic burnt top, while the New York cheesecake is baked at a much lower temperature to avoid any cracks or scorched tops. Also, classic New York style cheesecake is baked in a water bath, which isn't necessary for this mini burnt cheesecake.
MORE DELICIOUS CHEESECAKE RECIPES!


Let me know how this mini burnt cheesecake turns out for you below and consider leaving a recipe rating!
Recipe

Mini Burnt Cheesecake
Ingredients
- 14 oz (400g) full-fat cream cheese, room temperature
- ¾ cup (150 g / 5.3 oz) sugar
- a pinch of salt
- 3 eggs (small-medium)
- ¾ cup + 1 tablespoon (200 ml) heavy whipping cream
- 1 teaspoon vanilla
- 20g (2½ tablespoons, leveled) all-purpose flour
Instructions
- Preheat the oven to 400 °F / 205 °C.
- Line the pan with a sheet of parchment paper. (I like to grease the pan first so that the parchment paper sticks to it.) Press the sides to create pleats that extend the pan.
- Using an electric hand mixer on low speed, beat the cream cheese, sugar and salt until everything is creamy, about 2 minutes. Scrape the sides of the bowl as needed.
- Add the eggs, one at a time, beating for one minute after each.
- Add the cream and the vanilla and mix until just combined.
- Stop the mixer and add the flour by sifting it over the egg mixture.
- Then beat on low speed again for about half a minute to combine everything.
- Pour the cheesecake batter into the prepared pan and bake it for 45 minutes, or until the top is dark golden brown. It will puff up, but still be a little wiggly in the middle. Then it will deflate and sink as it cools.
- When done, take the cheesecake out of the oven and let it cool in the pan for an hour at room temperature.
- Lift the cheesecake out of the pan and gently pull back the parchment paper before slicing.
- Enjoy!
Notes
Wrap individual slices in plastic wrap and then place them in a freezer bag or freezer safe container. Store it in the freezer for up to about 2 months. Recipe slightly adapted from: The Guardian ©Pastry Wishes
monika
Would this recipe still work without the flour?
I have celiac, but also don't use gluten-free flour at all.
Thanks.
Voula
Hi, Monika!
Technically, this recipe should work fine with cornstarch instead of flour, although I haven't tried it myself! However, because cornstarch is a bit stronger as a thickener than flour, I would only add 2 tablespoons. Let me know how it turns out!